I’ve decided to order a crafters pin vise hand drill with super tiny drill bits as well as a small vise clamp in the hope of being able to more precisely drill holes into both the sides of the doors and trim pieces to fit the hinge nails into rather than knocking them in with a hammer. With any luck, doing this will prevent the exterior wood veneer panels from splitting when I try to mount them to the trim and doors themselves.
With the latest plan to mount the interior doors and trim directly onto the walls rather than inside the actual door wells, I carefully painted the wells with white acrylic paint since they’ll be visible upon the completion of the dollhouse and so at this point I can finally move forward with wallpapering the interior since there will be definite trim in place around the wells once installed and no further worry of needing to do any cutting inside the actual house.
Wallpaper! The bit that’s most frightened me about this process. It’s here. Now, let me say quickly as an aside here: Hubs came through by cutting the remaining missing baseboards and trim pieces. I offered to do it if he'd teach me me but he didn’t want to risk me losing a finger, apparently. So it was he who used the saw while I stayed comfortable in the cooler temperatures inside the house - but really, only to make sure our daughter didn't go out there!

Here are the new and old baseboards (not yet glued down):


We lack the ability to create the step detail on them at this time:

So, I’m setting aside while I ponder how to proceed.
After going back through all my exterior trim and confirming I had the necessary pieces for the facades and roof, Hubs made the remaining quoins for me. These will go on the exterior side walls and you’ll see them here laid out on the carpet in brown and white from the wood he used to make them:

I put a first coat of primer on them and then scored the detail with my x-acto knife. When I put the first coat on over it, I wasn’t impressed with the fact that the detail didn’t show like the original quoins, as seen in quoin on far right:

This time I scored more deeply:

Not an exact match but, once painted, they look pretty good and the average person won’t notice unless they know to look, I think:

Okay, no more procrastinating. Wallpaper. Naturally, I made templates:


Even with these templates (I made them for every single wall), there’s still so much to consider, such as: the walls of this dollhouse are not exactly level, the wallpaper isn't going to line up perfectly which will make matching the patterns of the paper line up on each wall difficult. Also, I needed to leave enough room at the base for the height of the floors (which haven’t even been made) and the height of the baseboards once installed. Crown molding will also need to be factored in for any papers with detailed patterns at the upper section:
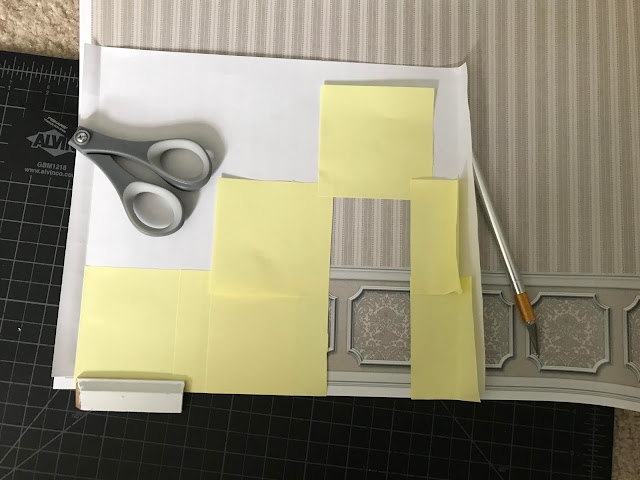
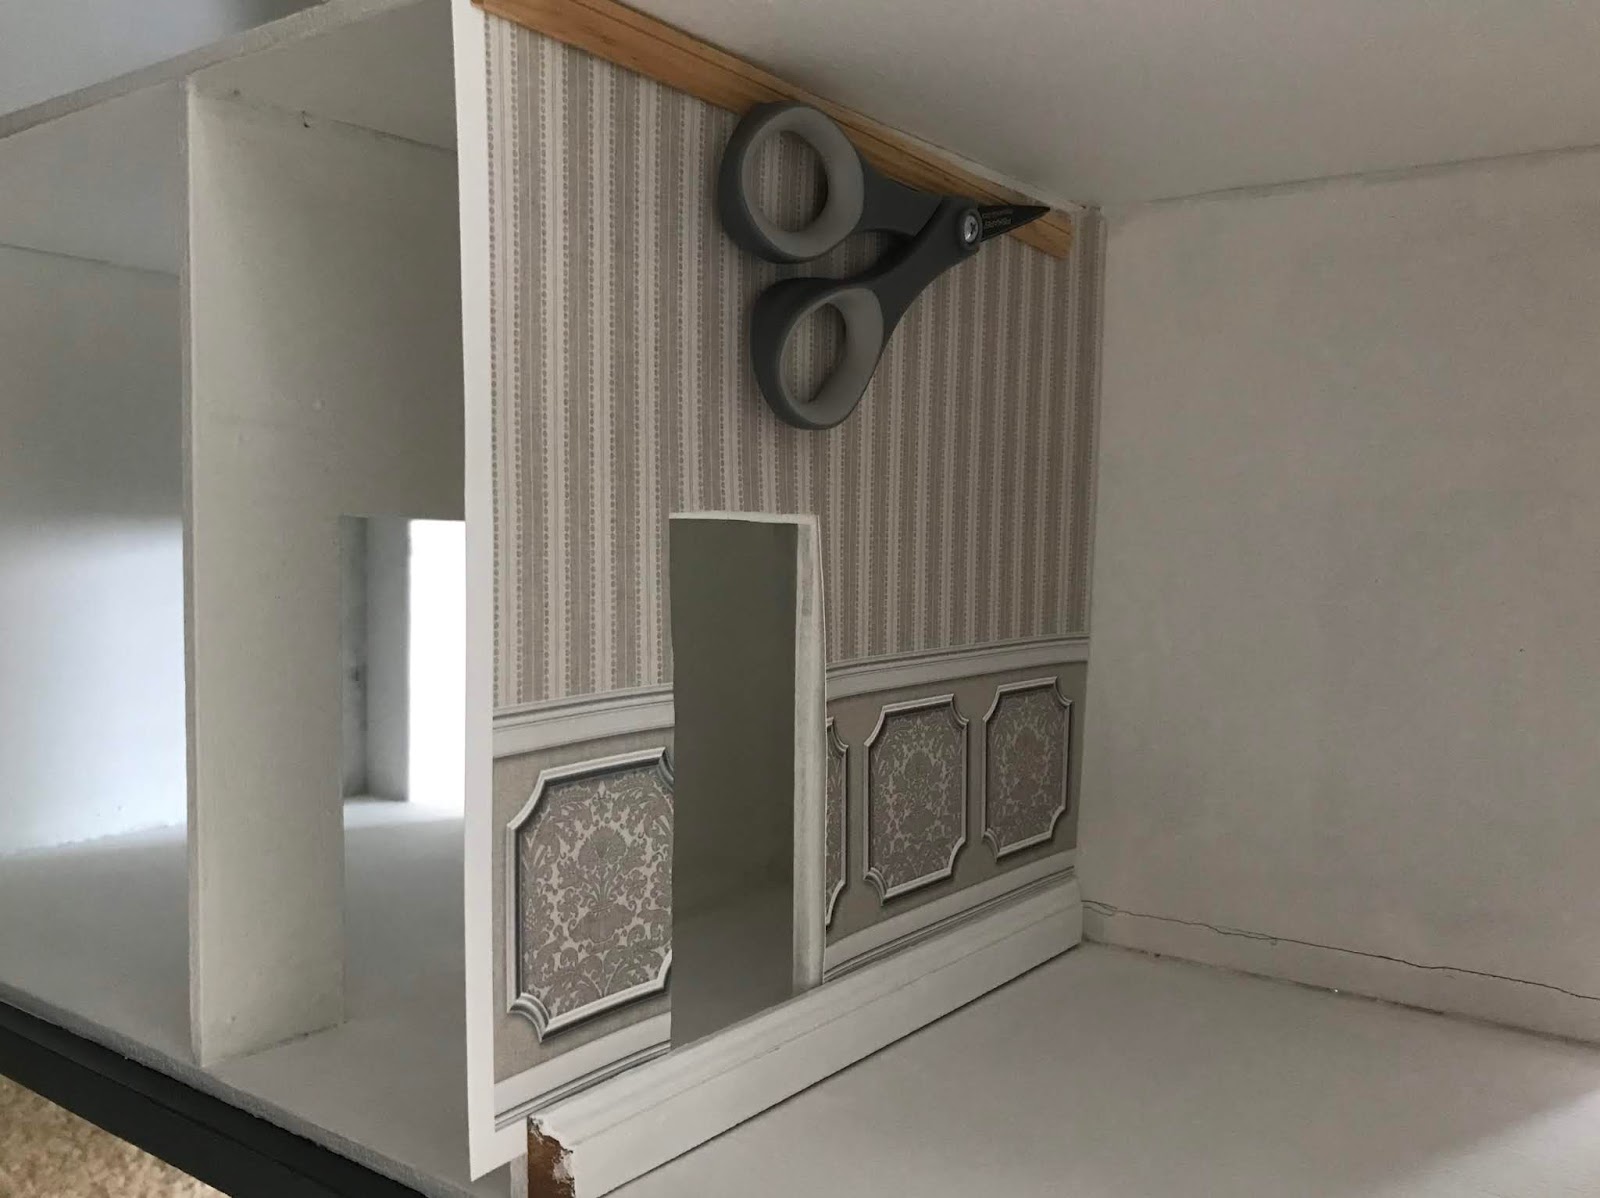
To that end, when I cut out the paper I left space on the back wall section to allow it to overlap the sides so that there wouldn’t be any corner gaps. In this shot below, and no, the scissors aren’t magically levitating at the top, I needed them to weigh the paper down after I turned the house on it’s side so I could “imagine" the paper with the crown and baseboards in place:


Now, when I originally started wallpapering I thought I already had my flooring figured out. I’d purchased hardwood flooring wallpaper but once I had the wallpaper in place I didn’t think they quite fit the overall concept of handmade. I wanted this house to “pop” and have history built into it. I want a meaningful heirloom for my daughter. Trouble is, I’d already papered the wall with flat paper in mind, sooooo...different flooring might later present a problem as the baseboards will not land where they currently do with even the slightest rise in flooring height.
I considered coffee stir stick flooring as so many have done and also placed an online order for vinyl hardwood flooring plank samples, thinking maybe I’d cut strips out them. Having done that, I let the flooring quandary fill my background thoughts while continuing on with wallpapering the rest of the rooms of the dollhouse.
But then the vinyl planks arrived, and let me tell you, they were thick!

I'd checked the sample measurements before ordering but apparently neglected to notice how thick they were. I love the look and idea of them but...they're just too thick! I tried scoring with my utility knife, making what felt like 800 passes, but it was obvious this method wasn’t getting me through that puppy. I then spent too much time thinking about and looking into alternative methods for cutting them. All those options would require more money and I’m just not down with that. At the end of the day, even were I to find a way to cut them into planks, they'd still be 5 mm thick! I'd gotten another set, but these were even worse, 7 mm! Either choice would totally mess up my baseboard vs wallpaper height!
Cutting down and staining stir sticks was still an affordable default option. I returned to wallpapering while I let the dilemma marinate in the background.
I found I didn’t have enough wallpaper for one of my smaller interior hallways. I decided to cut it in half and only paper the upper section as I had enough to accomplish that and figured I’d install beadboard at its base. I now knew I didn’t buy enough of that either, which was originally planned for use in the room that will serve as the bathroom, but I could just skate by using it in this tiny room, so it wouldn't be a loss. I had to plan around door trim but since I can’t actually install it until after the floors are in, once again the house is on its side to “imagine”) That little piece sticking up by the door is where the door trim will be glued into place:

I cut chair rail and glued and fit pieces together:


I also fiddled around with making the actual 45 degree angle door trim cuts, just to see what will be required to do it when the time comes:

When I finally got around to making the template for the final room I needed to wallpaper, I just about pulled my hair out. It was incredibly tight in there and so difficult to be precise on all these oddly shaped walls. Particularly because there’s detail at the top of the paper:


Now, at this point in time I did something that in hindsight was just plain stupid. After dropping my daughter off at preschool I made a trip to the hardware store and found a new flooring option: another vinyl hardwood, just one with a much lower thickness profile. This was not the stupid part. After all that measuring and cutting and placing and wallpapering....just all the struggles that came with it, misalignment issues, etc...I should have left it at that since it was late in the evening and I’d just gotten pidgeon to bed, I could have called it a day and let myself relax, but no, I was excited to try out my latest idea and started on flooring.
I cut a template and scored the size of plank I wanted into the strip:

It’s a tedious process, believe me, and I went with a random pattern; thus, multiple sizes and cuts were made. It was a bit like Tetris:

The eagle-eyed reader will spot the problem. After all that work: I'd cut against the grain of the wood, so it looks nothing like a normal hardwood floor would appear! I could leave it, move forward, because it really isn’t that horrible; but I know myself and it will always bother me. I could never be happy if one room was done differently than the others.
It was late and I was frustrated. I still needed to get our dog, who suffers from summer skin allergies, into a bath, and take a shower myself. I’m the kind of person who gives myself time to process negative situations and then searches for an upside. It's a survival thing, I guess. By morning, I’d decided to use that foul up attempt as a tool. I taped off a small section, glued just a few planks down onto the cardstock template I'd made (it's easier to work outside the house than inside). This was Test A, which would allow me to see if my adhesive of choice would hold up well. Then test B: I added little black sharpie dots to mimic nail holes:

When this dries I’ll mix up some vinyl spackle and some sort of dark stain or paint to fill in the gaps in the wood so it looks more in line with an actual hardwood floor. If that finishes up as I hope I’ll continue on, moving forward with the new process I'll have learned only because I made those earlier mistakes. If not, I’ll keep using the failed piece, marked off by section, to keep trying different processes until the result is to my liking.
With the latest plan to mount the interior doors and trim directly onto the walls rather than inside the actual door wells, I carefully painted the wells with white acrylic paint since they’ll be visible upon the completion of the dollhouse and so at this point I can finally move forward with wallpapering the interior since there will be definite trim in place around the wells once installed and no further worry of needing to do any cutting inside the actual house.
Wallpaper! The bit that’s most frightened me about this process. It’s here. Now, let me say quickly as an aside here: Hubs came through by cutting the remaining missing baseboards and trim pieces. I offered to do it if he'd teach me me but he didn’t want to risk me losing a finger, apparently. So it was he who used the saw while I stayed comfortable in the cooler temperatures inside the house - but really, only to make sure our daughter didn't go out there!

Here are the new and old baseboards (not yet glued down):


We lack the ability to create the step detail on them at this time:

So, I’m setting aside while I ponder how to proceed.
After going back through all my exterior trim and confirming I had the necessary pieces for the facades and roof, Hubs made the remaining quoins for me. These will go on the exterior side walls and you’ll see them here laid out on the carpet in brown and white from the wood he used to make them:

I put a first coat of primer on them and then scored the detail with my x-acto knife. When I put the first coat on over it, I wasn’t impressed with the fact that the detail didn’t show like the original quoins, as seen in quoin on far right:

This time I scored more deeply:

Not an exact match but, once painted, they look pretty good and the average person won’t notice unless they know to look, I think:

Okay, no more procrastinating. Wallpaper. Naturally, I made templates:


Even with these templates (I made them for every single wall), there’s still so much to consider, such as: the walls of this dollhouse are not exactly level, the wallpaper isn't going to line up perfectly which will make matching the patterns of the paper line up on each wall difficult. Also, I needed to leave enough room at the base for the height of the floors (which haven’t even been made) and the height of the baseboards once installed. Crown molding will also need to be factored in for any papers with detailed patterns at the upper section:

To that end, when I cut out the paper I left space on the back wall section to allow it to overlap the sides so that there wouldn’t be any corner gaps. In this shot below, and no, the scissors aren’t magically levitating at the top, I needed them to weigh the paper down after I turned the house on it’s side so I could “imagine" the paper with the crown and baseboards in place:

Now, when I originally started wallpapering I thought I already had my flooring figured out. I’d purchased hardwood flooring wallpaper but once I had the wallpaper in place I didn’t think they quite fit the overall concept of handmade. I wanted this house to “pop” and have history built into it. I want a meaningful heirloom for my daughter. Trouble is, I’d already papered the wall with flat paper in mind, sooooo...different flooring might later present a problem as the baseboards will not land where they currently do with even the slightest rise in flooring height.
I considered coffee stir stick flooring as so many have done and also placed an online order for vinyl hardwood flooring plank samples, thinking maybe I’d cut strips out them. Having done that, I let the flooring quandary fill my background thoughts while continuing on with wallpapering the rest of the rooms of the dollhouse.
But then the vinyl planks arrived, and let me tell you, they were thick!

I'd checked the sample measurements before ordering but apparently neglected to notice how thick they were. I love the look and idea of them but...they're just too thick! I tried scoring with my utility knife, making what felt like 800 passes, but it was obvious this method wasn’t getting me through that puppy. I then spent too much time thinking about and looking into alternative methods for cutting them. All those options would require more money and I’m just not down with that. At the end of the day, even were I to find a way to cut them into planks, they'd still be 5 mm thick! I'd gotten another set, but these were even worse, 7 mm! Either choice would totally mess up my baseboard vs wallpaper height!
Cutting down and staining stir sticks was still an affordable default option. I returned to wallpapering while I let the dilemma marinate in the background.
I found I didn’t have enough wallpaper for one of my smaller interior hallways. I decided to cut it in half and only paper the upper section as I had enough to accomplish that and figured I’d install beadboard at its base. I now knew I didn’t buy enough of that either, which was originally planned for use in the room that will serve as the bathroom, but I could just skate by using it in this tiny room, so it wouldn't be a loss. I had to plan around door trim but since I can’t actually install it until after the floors are in, once again the house is on its side to “imagine”) That little piece sticking up by the door is where the door trim will be glued into place:

I cut chair rail and glued and fit pieces together:


I also fiddled around with making the actual 45 degree angle door trim cuts, just to see what will be required to do it when the time comes:

When I finally got around to making the template for the final room I needed to wallpaper, I just about pulled my hair out. It was incredibly tight in there and so difficult to be precise on all these oddly shaped walls. Particularly because there’s detail at the top of the paper:

Nevertheless, the papers are all in! There are two rooms in these pictures where the glue is still drying and the papers are still overhanging the edges as they hadn’t yet been trimmed:


Now, at this point in time I did something that in hindsight was just plain stupid. After dropping my daughter off at preschool I made a trip to the hardware store and found a new flooring option: another vinyl hardwood, just one with a much lower thickness profile. This was not the stupid part. After all that measuring and cutting and placing and wallpapering....just all the struggles that came with it, misalignment issues, etc...I should have left it at that since it was late in the evening and I’d just gotten pidgeon to bed, I could have called it a day and let myself relax, but no, I was excited to try out my latest idea and started on flooring.
I cut a template and scored the size of plank I wanted into the strip:

It’s a tedious process, believe me, and I went with a random pattern; thus, multiple sizes and cuts were made. It was a bit like Tetris:

The eagle-eyed reader will spot the problem. After all that work: I'd cut against the grain of the wood, so it looks nothing like a normal hardwood floor would appear! I could leave it, move forward, because it really isn’t that horrible; but I know myself and it will always bother me. I could never be happy if one room was done differently than the others.
It was late and I was frustrated. I still needed to get our dog, who suffers from summer skin allergies, into a bath, and take a shower myself. I’m the kind of person who gives myself time to process negative situations and then searches for an upside. It's a survival thing, I guess. By morning, I’d decided to use that foul up attempt as a tool. I taped off a small section, glued just a few planks down onto the cardstock template I'd made (it's easier to work outside the house than inside). This was Test A, which would allow me to see if my adhesive of choice would hold up well. Then test B: I added little black sharpie dots to mimic nail holes:

When this dries I’ll mix up some vinyl spackle and some sort of dark stain or paint to fill in the gaps in the wood so it looks more in line with an actual hardwood floor. If that finishes up as I hope I’ll continue on, moving forward with the new process I'll have learned only because I made those earlier mistakes. If not, I’ll keep using the failed piece, marked off by section, to keep trying different processes until the result is to my liking.


Comments
Post a Comment