Posts

Showing posts from April, 2018
Image
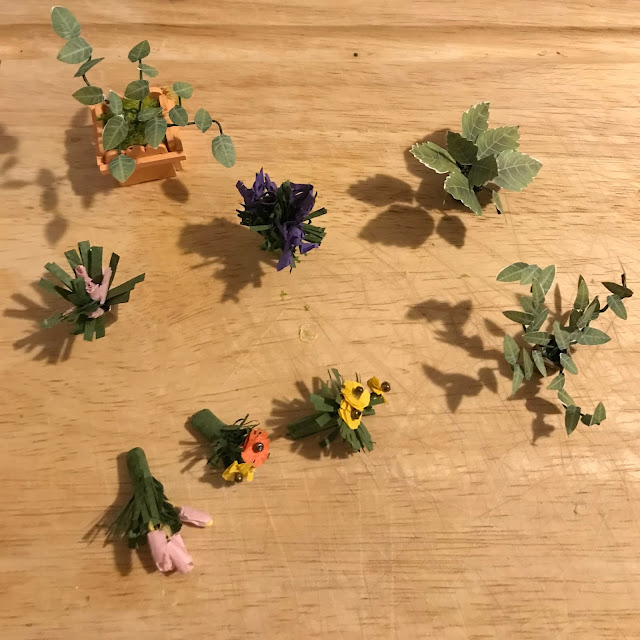
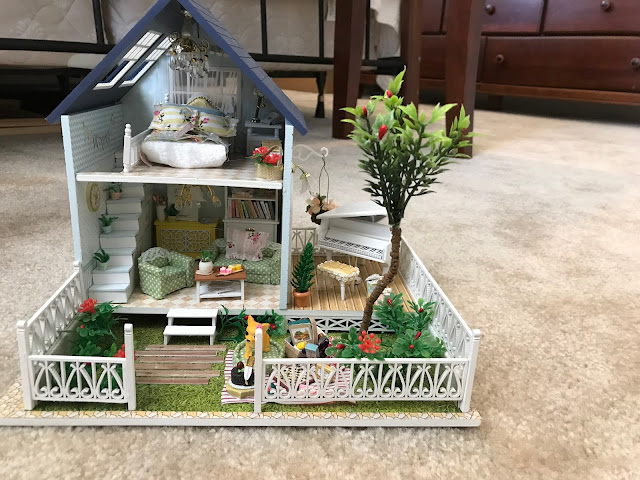
My daughter discovered the dog that came with the Nordic DIY house I've been working on and promptly named him Fred. In a matter of 24 hours, she's already broken one of Fred's ears...twice. I've also been worked pretty hard to finish "Fred's" house, to the point that my back is killing me and the inside of my middle finger has gone numb. I suspect it's from all that tiny scissor work pressing on a nerve. Or perhaps from being hunched over and squinting in concentration (and yes, I admit, crying out in frustration a time or eighty). I didn't take pictures of the process on this one. As I mentioned, someone was riding me to finish it as quickly as possible. For Fred. Sigh. Here is the finished product (please excuse the background, I was having trouble with lighting on the day I took these): The Nordic house has a music box inside, which added a nice touch to this particular project. My daughter likes to wind it up and practice her
Image
In my last post, I uploaded an image of the completed DIY Garden Kit. What I failed to mention is that it turns out my daughter is a stealth Ninja. In the past, I'd only worked on it while she was in morning preschool or while she was sleeping at night. But on the day I would finally finish the kit, I decided for the first time, seeing as my sweet child appeared happily occupied in the loft, I went back to our spare room to try to paint some of the remaining pieces. Within seconds I heard, "Mama, what are you doing?" She'd snuck up on me! And as I turned around, it gave her just enough of a view of the garden kit in progress, such that her bright blue eyes went wide with wonder and her little cherub mouth formed a great big O of delight. And honestly, folks, being found out wasn't the nightmare I'd imagined. As I painted and glued and told her all about what I was doing, she stood patiently at my side, seemingly content to stare and comment on all the pieces I
Image
After completing the last of the flower/planter pieces, I set about finishing up the last of the painting, gluing, and assembling. I'm pleased and relieved to announce that the DIY garden kit is now complete! This particular one is by a company called ROBOTIME and I'll go ahead and add a link at the bottom, just in case anyone has an interest in purchasing one. If the link should fail though, they're all over the Internet at tons of websites. Just search "DIY dollhouse garden kit" and you should be able to find it easily. https://www.amazon.com/ROBOTIME-Miniature-Dollhouse-Furniture-Birthday/dp/B0771LWLDF/ref=sr_1_3?ie=UTF8&qid=1524315910&sr=8-3&keywords=diy+dollhouse+garden+kit
Image
In recent posts, I’ve made mention of how small and delicate many of the pieces are for this DIY garden kit. In this post, I’m going to give you an opportunity to understand just what I mean by that. Here is the picture of a climbing vine I’m meant to make: And the teeny tiny flowers that must be cut out and individually glued onto the cut green wires: Look like fun? Then this is the sort of kit for you! The Finished Climbing Vine sitting atop a glue stick Last but not least, a snapshot of the other pieces I just finished up: Kraft paper flower pots, Straw hat, as well as all of the potted plant/flower work which is referred to in the guide as Bonsai No. 1, 2, 3, 4, 5, 6, 7, 8, 9, 10,  and 11 (the climbing vine). I'm excited to say that, while there's still MUCH to do, I'm finally nearing the end of this project. There are about two more pages of flower, plant, and container assembly at which point, at least it appears upon cursory review
Image
I absolutely Must. Stop. My. Erna. Meyer. Obsession. I purchased more vintage dolls, folks. Two additional grandparents along with various others that in my mind work as two aunts, an uncle, and two cousins. I must never again search the term: "Erna Meyer Dolls" and that's all there is to it. It doesn't matter how much joy I take in imagining my daughter playing with them at some far off point in the future. It has to end. Now. Nevertheless, here are the new (old) ones in all their adorable glory (though they haven't yet made their way to my doorstep): And lastly, the progress I've made on the DIY garden kit. Some of these pieces pictured below were exceptionally difficult. They either put them in this order in the hope that the crafter wouldn't get discouraged right from the start if one began the project with these, OR it just seems to get harder because you've been at it for so long that it feels the tiny detail work might never end
Image
I was successful in completing the shower curtain and in actuality am quite pleased with the outcome. It involved some light sewing as the fabric was frayed from cutting and getting the rod through the top section proved more difficult than I'd initially imagined. On the plus side, it didn't require the use of S-Hooks as I'd originally thought and thus will be more stable. Once the dollhouse bathroom is complete and I've determined the best spot for positioning the bathtub, I will most likely glue or magnetize the shower rod to the wall, whichever best holds its weight (cross fingers). I know I said I was going to wait on getting the Erna Meyer grandparent dolls but I came across a couple of vintage ones that look like they're in decent shape and went ahead with the purchase. Now I have to hope they make it here unscathed. Pictured below is the family I've put together. The center photo is just a sample from the Erna Meyer website and the outer pictures are
Image
I now return to the DIY outdoor garden kit. Over the course of the last couple of days I've managed to complete: Big wood frame, White chair, Triangle table,  Stepboard No.1, No.2, and No. 3, as well as the Bulletin board. I also made a hearty attempt at the wire Storage Rack. As you can see, it was a spectacular failure. I blame it on my having been overcaffeinated. Here's attempt No. 2 of the Storage Rack which I took on after I'd gotten my daughter to bed later that same night. It's far, far from perfect but the thing is standing upright. I'll either discard it or simply glue it to the ground when the kit is complete if I can disguise it inconspicuously somewhere in the background. I also finished the Rolling Cart. Lastly, I completed three Photo Frames, a small Toy House, an Eave, the smaller Window, as well as the Big Window with green and white plaid curtains (currently in the process of drying). Another project I'd like to work
Image
It occurs to me that there might eventually be eyes that land on this blog because they're hoping to determine what might be needed to take on a project such as this themselves. I don't imagine I'll know for certain all that's required until I have the dollhouse in front of me and am finally digging in. Still, I can pass along what I've made a priority thus far. Keep in mind, the Hobbies of Dereham Special Georgian No. 244 is pretty big, with 4 interior rooms and 2 hallways, one with a stairwell on one side of the house and another 4 interior rooms and 1 more hallway on the other. It also has a removable roof, which I'm hoping to utilize as a rooftop garden. There's a certain level of anticipation that comes with a project of this scope. I've gone ahead and purchased quite a number of items already. Some may end of up working and others may not. I can always list any items that don't work out on EBay or elsewhere, but having these thing
Image
The family vacation/road trip that will allow me to retrieve the dollhouse is still months from taking place, which means I've spent a lot of time thinking about the challenge ahead. It's both invigorating and overwhelming looking at all the ways in which others have accomplished this same task, and there are some positively inspiring and gorgeous dollhouses out there! I'm no expert and not looking to reinvent the wheel here, but I don't want to simply throw a coat of paint on the thing and call it a day, either. I've been busy making lists of the supplies I'll need and even made several idea boards and wish lists, but at the end of the day, it doesn't do much to satisfy the desire of actually beginning the process. I decided I needed something bigger in the interim to help scratch the itch. There's this little space under the removable roof: My thought is that it would be a nice way to pay tribute to my own mother by ultimately turning that sp
Image
A couple years ago my mother offered up an old dollhouse she'd been gifted. I adored the one I had growing up. I'd saved birthday money, Christmas money, chore money, ANY money; and all so that I could purchase the kit myself. It cost a small fortune for someone so young. I didn't build it myself, mind. I was young and active and wasn't going to sit still long enough for that. No, the actual construction was outsourced.  It was a Greenleaf Pierce, and oh! How I loved that dollhouse! My mom, bless her, occasionally took me to craft shows several hours away just so I could furnish and accessorize it to my liking. Greenleaf Pierce Dollhouse I selected different colors than those pictured for mine. Some combination of peach and blue, if memory serves. I'm not fibbing when I say I can recall the actual shade of the blue paint, though: wedgewood blue.  After I grew up and moved away the dollhouse was relegated to our outdoor shed and some years later, i